
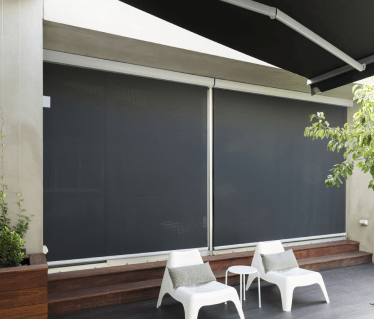
Outdoor roller blinds are famous for creating shade, privacy, and style in outdoor spaces. Installing these blinds may seem daunting initially, but it can be straightforward with the appropriate tools and instructions. This article will give you the insight of a step-by-step guide on installing outdoor roller blinds near me. Following these instructions, you can confidently install your roller blinds and enjoy their benefits to your outdoor area.
1.Gather the Mandatory Tools and Materials: You must collect all the required tools and equipment before installing. These typically include a drill with appropriate drill bits, a measuring tape, a pencil, screws or anchors, brackets specific to your roller blinds, a spirit level, and a ladder or step stool for reaching higher areas. Ensure you have the correct size and type of roller blinds for your outdoor space.
2. Measure and Mark the Installation Points: Use a measuring tape to determine your roller blinds’ desired height and width. Mark these points on the wall or surface where you install the blinds. Ensuring the markings are level and accurately aligned with your desired position. Use a spirit level to double-check the accuracy of your markings.
3.Install the Brackets: Position the brackets at the marked points on the wall or surface. Depending on your roller blinds, you may have one or two frames. Place the rack (s) against the wall and align them with the markings. Use a pencil to mark the positions of the screw holes on the wall.
Next, create pilot holes at the marked positions using a drill with the appropriate drill bit. It will make it easier to insert the screws or anchors later. Insert anchors if necessary based on the surface you mount the brackets on. Then, align the stands with the pilot holes and secure them to the wall using screws.
Attach the Roller Blinds to the Brackets: After securely installing the brackets, it’s time to attach the roller blinds. Depending on the specific type of roller blinds you have, this step may vary slightly. Most roller blinds come with hooks or fixtures that must be inserted into the brackets.
Carefully lift the roller blinds and align the hooks or fixtures with the brackets. Slide the blinds into the stands, ensuring a secure fit. Once inserted, test the blinds by pulling them up and down to ensure they move smoothly.
Adjust and Level the Roller Blinds: Check their level after the blinds are attached. Use a spirit level to ensure they are horizontally aligned. If required, make adjustments by loosening the screws on the brackets and repositioning the blinds. Once the blinds are level, tighten the screws to secure them.
Test the Roller Blinds and Make Final Adjustments: Once the installation is complete, test the roller blinds by pulling them up and down. Ensure that they move freely and smoothly. Make any necessary adjustments to the brackets or blinds to ensure proper operation. Double-check that the blinds are level and aligned with your desired position.
Conclusion: Installing outdoor roller blinds Cranbourne can be manageable with the right tools and guidance. Following this step-by-step guide with instructions, you can appropriately install your roller blinds and enjoy the advantages they bring to your outdoor space. Remember to measure carefully, install the brackets securely, attach the blinds correctly, and make any necessary adjustments for proper alignment and smooth operation. With your newly installed roller blinds, you can create shade, privacy, and style in your outdoor area, enhancing your overall enjoyment of the space.